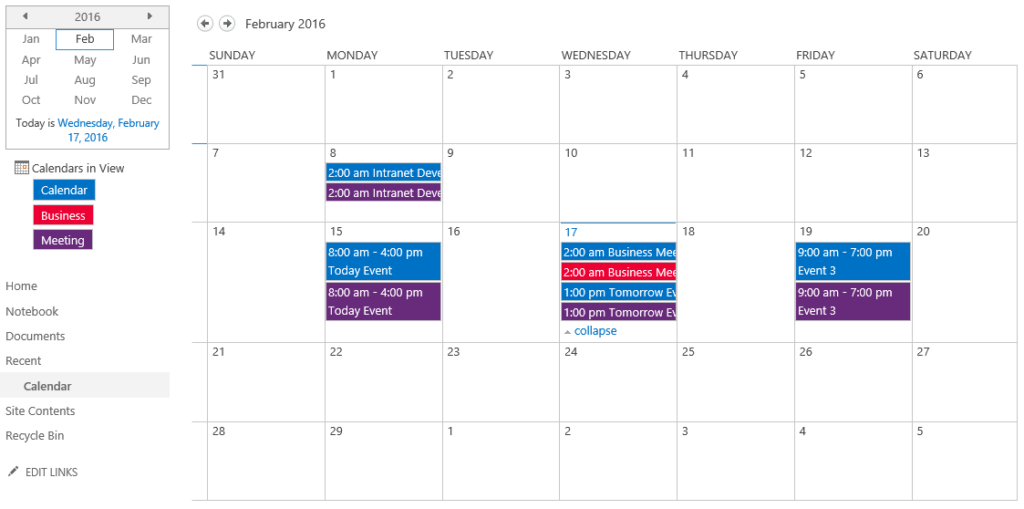
Calendar – being one of the most significant feature in SharePoint. Most of the time we use it in a meaningful way, but deep inside us, we need a little bit of customization. This article demonstrates the way of customizing the color code of calendar items based on a specific category.
Scenario: I need my calendar to show different colors for each category such as meeting, business, etc. Once we complete all the steps, you will see a calendar like this that has different color for each category. The filtering option can be used to either default “Category” field or you may create your own column with multiple choices as you need.
All right, let’s get started.
I have used SharePoint Online in this scenario. It will be the same for on-premise SharePoint as well.

So let’s get into the scene. First is to create Views on the Existing Calendar. Office 365 SharePoint will already have Calendar by default even for newly created sites.
Go ahead and create a new view by clicking on “Create View.”

To select the calendar view, click on it.

Give it a name and drag to bottom of the page. In this case it’s “Meeting” so you will see this name when I’m configuring the overlay at next levels.

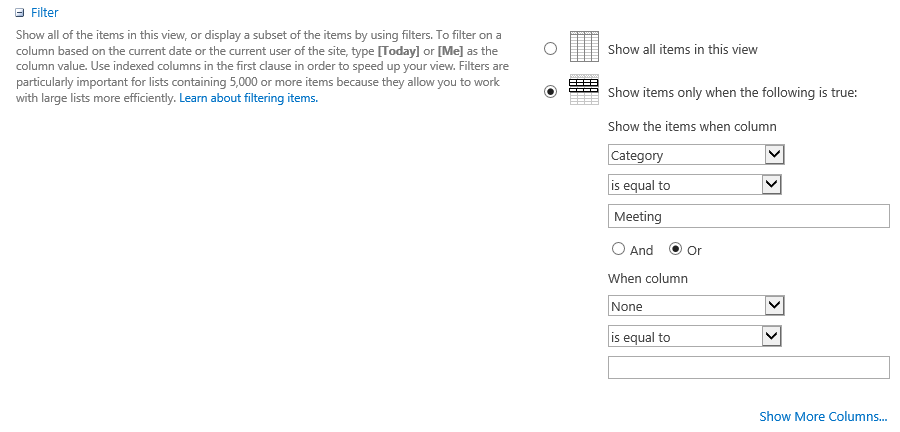
Choose the Filtering Option as you need it to be. In this case I will use the Category field to color up the events so each category will have a different color. First let’s create a view for the meeting category. Once selected the field and given the value which you want to filter, hit “okay” to save.

Now to configure the calendar overlay. Simply Click on “Calendar Overlay” icon on the ribbon.

It will bring you up to this page. Hit on new calendar here (Do not to be confused. This doesn’t mean you need to have multiple calendars here. It simply means you can have multiple calendars as well. Also you can have multiple views in a single Calendar too) so in this scenario, we will have multiple views in a single calendar in order to define different colors for each category.

Let’s create the first overlay for the Meeting Category first. URL will be automatically inserted. If your calendar on the root site, simply click Resolve to retrieve the list and view otherwise define the path for your calendar.
This is where you define the view you created earlier. From now on, all items created under Meeting Category will be shown in purple.

If you have many categories, repeat the same process for other category items as well (e.g. Birthday, Business). When you complete everything, the final calendar will look like this.

You now have wonderful and colorful SharePoint calendar! Enjoy SharePointing!


